Wednesday, June 24, 2020

Keto Chicken Fingers

Ingredients:
  • 1 tsp. garlic powder
  • 1 tsp. onion powder
  • 1/4 tsp. salt
  • 1 lb. chicken breast tenders
  • 1/2 cup fresh basil
  • 1/4 cup parsley sprigs
  • 1/4 cup blanched slivered almonds
  • 1 clove garlic
  • 1 jalapeno pepper, seeded (wear plastic gloves when handling)
  • 1/8 tsp. sea salt
  • 2 Tbsp. lemon juice
  • 2 Tbsp. extra-virgin olive oil
  • 2 Tbsp. water
  • Fresh basil, for garnish

Makes 4 Servings
  1. Coat a grill rack or broiler-pan rack with cooking spray. Preheat the grill or boiler.
  2. In a small bowl, combine garlic powder, onion powder and salt. Cut two 1/2"-deep slashes in each side of the chicken breast. Rub the spice mix on the chicken, pressing it into the slits. Place the chicken in a baking pan and coat completely with cooking spray. Let sit for 10 minutes.
  3. In a food processor, combine basil, parsley, almonds, garlic, jalapeno pepper and salt. Process until chopped. While the processor is running, add the lemon juice and oil through the feed tube, stopping the machine once or twice to scrape down the sides of the container until the sauce is smooth. Pour the sauce into a bowl. Stir in the water, cover and refrigerate until ready to serve.
  4. Place the chicken on the prepared rack and grill or broil 6" from the heat, turning several times, for 15 minutes, or until a thermometer inserted in the thickest portion registers 170°F and the juices run clear. Serve with the sauce and garnish with fresh basil.
WW POINTS VALUE: ? 

Note: This recipe appears on www.southbeachdiet.com/recipes. These chicken fingers are a healthy and flavorful take on traditional chicken fingers. They are not fried but broiled or grilled and are packed with flavorful herbs and spices as well as a jalapeno pepper. They are succulent and juicy and go great with a side of coleslaw. 
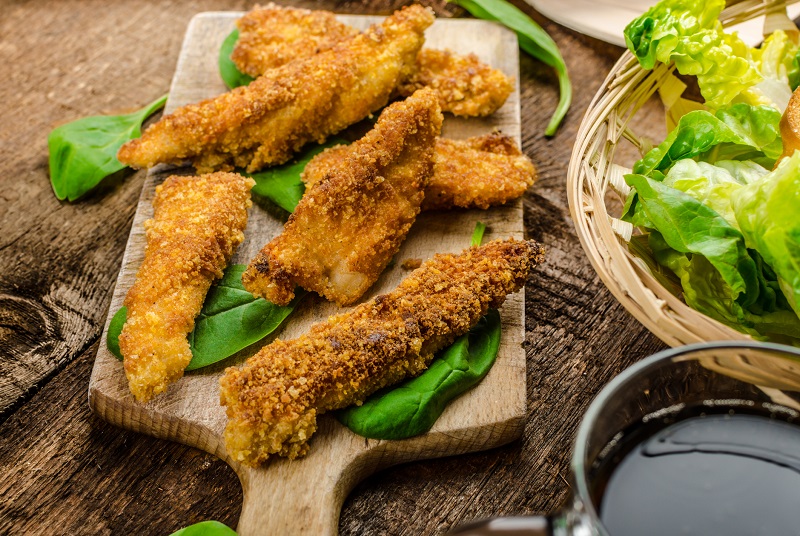
Lightened-Up Chicken Fingers

Monday, June 22, 2020

Keto Spaghetti & Meatballs

Ingredients:
Meatballs:
  • 1/2 lb. ground beef
  • 1/4 lb. ground pork
  • 2 tbsp. fresh minced garlic, divided
  • 1/2 cup almond flour
  • 2 tbsp. shredded Parmesan cheese
  • 1 egg

Sauce:
  • 1 tbsp. extra-virgin olive oil
  • 1 1/4 cup crushed tomatoes
  • 1 tsp. dried basil
  • 1 tsp. dried thyme
  • 1/2 tsp. dried oregano

Noodles:
  • 5 cups zucchini noodles
  • 1/4 cup chopped parsley
Makes 4 Servings (3 meatballs per serving)
  1. In a large mixing bowl, combine the beef, pork, 1 tablespoon of the garlic, almond flour, Parmesan cheese, egg, and salt and pepper to taste.
  2. Form the mixture into 12 meatballs.
  3. Heat the olive oil in a large saucepan or Dutch oven over medium-high heat. Add the meatballs and cook for 2-3 minutes on all sides, until browned. Work in batches to avoid overcrowding, if needed. 
  4. Remove the meatballs and set aside. 
  5. Reduce the heat to medium. Add the remaining 1 tablespoon of garlic to the pan and saute for 1 minute. 
  6. Add the crushed tomatoes, 1/2 cup water, basil, thyme. oregano, and salt and pepper to taste. Bring to a boil and then reduce heat to medium-low. Add meatballs back to the sauce and simmer covered for 10-12 minutes, until the meatballs are cooked through. 
  7. Turn off the heat. Add the zucchini noodles to the pot and toss to warm. Scoop the noodles, meatballs, and sauce onto 4 plates and garnish with chopped parsley. 
WW POINTS VALUE: 11 pts. 

Note: This recipe appears in the New Keto-Friendly South Beach Diet book. Who knew keto-friendly spaghetti and meatballs could taste so good? This take on an Italian comfort food classic is quite filling and flavorful. You can make zucchini noodles with a spiralizer and they come out great. If you're planning ahead, you can make the meatballs and sauce in an airtight container in the refrigerator for up to 4 days. Then you can reheat the meatballs and toss with the zucchini noodles. You can also use ground turkey, veal, beef, chicken or pork in this recipe and the dish will still taste delicious. 

Wednesday, June 17, 2020

Spinach and Artichoke Quiche Cups

Ingredients:
  • 3 large eggs, lightly beaten
  • 1/2 cup heavy cream
  • 2 Tbsp. olive oil
  • 1/2 cup cherry tomatoes, halved
  • 3 scallions, thinly sliced
  • 1/3 cup canned artichoke hearts, chopped
  • 1/3 cup cooked bacon (5-6 slices) or pancetta, chopped
  • 1/3 cup roasted red peppers, chopped
  • 2 cups baby spinach
  • 1/3 cup Kalamata olives, pitted and sliced
  • 1 Tbsp. fresh chopped oregano or 1 tsp. dried oregano
  • 1/3 cup crumbled feta cheese
  • 4 Tbsp. shredded kefalotiri or Parmesan cheese
  • salt
  • freshly ground black pepper
Makes 6 Servings (1 quiche per serving)
  1. Preheat the oven to 375°F.
  2. Line a 6-cup muffin tin with paper cupcake liners (or grease lightly with butter) and set aside.
  3. Whisk together the eggs and heavy cream in a large bowl.
  4. Heat the olive oil in a large skillet over medium heat. Add the cherry tomatoes and scallions and cook for 2 to 3 minutes, stirring often.
  5. Add the artichoke hearts, bacon, roasted peppers and spinach. Cook for 1 minute until the spinach has just wilted.
  6. Add the mixture to the bowl with the eggs and cream. Stir in the olives, oregano and feta and season with salt and pepper to taste.
  7. Using a 1/4 cup measure, divide the mixture among the prepared cups, filling until about 1/4-inch from the top.
  8. Sprinkle the shredded cheese on top.
  9. Bake for 15 to 18 minutes, or until golden and the eggs are set.
  10. Remove quiche cups from the oven and let them cool slightly before serving.
WW POINTS VALUE: 7 pts. 

Note: This recipe appears in the New Keto-Friendly South Beach Diet book. Don't be intimidated by the ingredients in this recipe. A quiche is a French dish that usually has a pastry crust and is filled with eggs, milk or cream. Quiches can also be made with vegetables, meat and seafood. These mini quiche cups are filled with Mediterranean flavors, both cheese and vegetables, and are great for breakfast, lunch or an on-the-go snack. Kefalotiri is a hard Greek cheese. If you don't have this chees on hand, Parmesan cheese will work just as well. These quiche cups are flavorful and will quickly fill you up. 

Instant Pot Shredded Chicken Taco Soup

Ingredients:
  • 2 tbsp. olive oil
  • 1 green pepper, chopped
  • ½ onion, chopped
  • 3 garlic cloves, minced
  • 1 ½ lb. boneless, skinless chicken breasts
  • 6 cups chicken broth
  • 1 (10 oz). can diced tomatoes and green chilies
  • 2 Tbsp. butter
  • 2 Tbsp. chili seasoning
  • 1 tsp. cumin
  • 1 tsp. dried oregano
  • 4 oz. cream cheese, softened
  • salt
  • freshly ground black pepper
Makes 8 Servings
  1. Set Instant Pot to sauté function and allow to heat. Add the olive oil, then the chopped green peppers, onions and garlic. Sauté, stirring constantly until the onions and green peppers begin to soften (about 3-4 minutes).
  2. Pour in about ½ cup of the chicken broth, then use a wooden spoon to scrape any brown bits that may be stuck to the bottom.
  3. Add the chicken to the pot and top with all of the other ingredients except for the ranch seasoning and cream cheese. Place the lid on the Instant Pot to seal.
  4. Set to high pressure for 14 minutes.
  5. Once the cooking time has completed, allow a 5-minute natural pressure release, then do a quick release by turning the pressure valve to release the steam.
  6. Once all the steam has released, remove the lid.
  7. Move the chicken breasts to a plate and shred using two forks. Set aside.
  8. Turn the Instant Pot back on to the sauté function and add the ranch seasoning.
  9. In a medium sized bowl, add in the softened cream cheese and about 1 cup of the soup mixture from the Instant Pot. Use an immersion blender or whisk to combine the cream cheese and soup thoroughly. Pour the mixture back into the Instant Pot. Stir to combine.
  10. Boil for about 3 minutes on sauté function, then add back in the chicken. Season with salt and pepper to taste.
WW POINTS VALUE: ?

Note: This recipe appears on www.southbeachdiet.com/recipes. Soup and Mexican food are wonderful comfort foods when they are done right. This soup will be a new favorite comfort food at your table. This hearty soup is a new take on traditional chicken soup. It's filled with flavor and vegetables that will warm your soul and make you feel good afterwards. There is also minimal cleanup when the soup is done. The cream cheese adds a nice texture to the soup as well. 
instant pot soup

Chocolate Truffles

Ingredients:
  • 8 oz. bittersweet chocolate, chopped
  • 3 tbsp. unsalted butter
  • 1/3 cup fat-free half-and-half
  • 3 tbsp. finely chopped toasted hazelnuts
  • 3 tbsp. unsweetened cocoa powder
Makes 32 Servings (1 truffle per serving)
  1. Line a 5 X 9-inch loaf pan with plastic wrap; spray with nonstick spray. 
  2. Combine the chocolate and butter in a medium saucepan and set over low heat. Cook, stirring often, until melted and smooth. Remove the saucepan from the heat and stir in the half-and-half until well blended. 
  3. Scrape the chocolate mixture into the loaf pan and spread evenly. Cover tightly with plastic wrap and refrigerate until firm, at least 3 hours or up to 2 days. 
  4. Put the hazelnuts and cocoa powder on 2 separate plates. Invert the loaf pan onto a cutting board; remove the plastic wrap. With a sharp knife, cut the chocolate mixture into 32 equal squares. Lightly coat half of the squares in the hazelnuts and half in the cocoa powder. Place the truffles in a covered container, separating the layers with sheets of wax paper. Refrigerate up to 1 week. 
WW POINTS VALUE: 1 pt. 

Note: This recipe appears in the WW Best-Ever Desserts Cookbook. You can have your truffles and eat them too. These sweet truffles are sugar-free and are chocolatey and addictive. I highly recommend using bittersweet or dark chocolate for a richer flavor. I also highly recommend putting the chopped hazelnuts into the truffles for more of a crunch. These sweet treats literally melt in your mouth they are that delicious. 

Monday, June 8, 2020

Mocha Pots de Creme

Ingredients:
  • 1 cup half-and-half
  • 4 oz. bittersweet chocolate, finely chopped
  • 1 tsp. instant espresso powder
  • 1/2 tsp. vanilla extract
  • 1/2 cup fat-free egg substitute or 1 egg finely mixed
  • 2 tbsp. packed dark brown sugar
  • pinch salt (optional) 
  • 4 whole coffee beans, for garnish (optional)
Makes 4 Servings (1/2 cup custard per serving)
  1. Preheat the oven to 325 F. 
  2. Bring half-and-half just to a boil in a medium saucepan set over medium-high heat. Remove the saucepan from the heat. Add the chocolate, espresso powder, and vanilla; whisk until the chocolate is melted and the mixture is smooth. 
  3. Whisk together eg substitute or egg, brown sugar and salt in a medium bowl. Whisk in 1/2 cup of the half-and-half mixture. Add the remaining half-and-half mixture in a slow, steady stream, whisking constantly. Pour through a fine-mesh sieve over a medium bowl. 
  4. Divide the custard evenly among four 5-ounce ramekins or 6-ounce custard cups and place a 9-inch square baking pan. Put the pan in the oven and add enough boiling water to the pan to come halfway up the sides of the ramekins . Loosely cover the pan with foil to prevent  an skin from forming on the custards. Bake until the custards are barely set around the edges and jiggle in the center, about 25 minutes. Do not overbake, the custards will continue to firm up as they cool. 
  5. Carefully transfer the ramekins to a rack and cool. Refrigerate, covered, until thoroughly chilled and set, at least 3 hours or up to 1 day. Garnish each pots de creme with a coffee bean (if using). 
WW POINTS VALUE: 5 pts. 

Note: This recipe appears in the WW Best-Ever Desserts Cookbook. Pots de creme is French for pots of cream. Pots de creme date back to 17th century France when these desserts were serve in porcelain cups. They are usually made from eggs, egg yolks, milk and a flavor, usually vanilla or chocolate. Other pots de creme flavors can include coffee, maple, mint or pumpkin. These desserts are elegant and flavorful and are the perfect ending to a decadent dinner. They leave a nice aftertaste in your mouth because they have such a nice texture to them. 

Monday, June 1, 2020

Spinach and Feta Egg Cups

Ingredients:
  • 20 eggs
  • 1 cup whole buttermilk
  • 1 cup plain whole-milk Greek yogurt
  • 1/2 cup chopped spinach
  • 1/4 cup crumbled feta cheese
Makes 24 egg cups (2 egg cups per serving)
  1. Preheat the oven to 350 F. 
  2. Lightly grease with butter two 12-count muffin tins (for 24 total muffins) and set aside.
  3. Whisk the eggs, buttermilk, yogurt, salt and pepper to taste in a large mixing bowl.
  4. Divide the mixture evenly between 24 prepared muffin cups. 
  5. Divide the chopped spinach and feta among the cups. 
  6. Transfer to the oven and bake for 20-25 minutes, until the eggs are set. 
  7. Cool for 5-10 minutes in muffin tins and then gently slide a butter knife around the edges to release the egg cups. Remove them to a wire rack. 
  8. Serve warm or store in an air tight container in the refrigerator for 3-4 days. 
WW POINTS VALUE: 6 pts. 

Note: This recipe appears in the New Keto-Friendly South Beach Diet Book. Eggs, vegetables and cheese for breakfast is quite delicious. These particular egg cups are filling and flavorful. The combination of spinach and feta takes you back to Greece and makes you wish you were eating breakfast overlooking to the Greek Isles. 

Lemon Cheesecake with Blueberry Sauce

Ingredients:
Crust:
  • 1 1/2 cups reduced-fat graham cracker crumbs (about 10 graham crackers)
  • 1 tbsp. unsalted butter
  • 1 tsp. ground cinnamon
  • 1 tsp. ground nutmeg

Topping:
  • 2 cups fat-free sour cream
  • 1/4 cup granulated sugar

Cake:
  • 4 (8 oz.) packages light cream cheese, softened
  • 1/2 cup granulated sugar
  • 2 large eggs
  • 2 large egg whites
  • 1 tbsp. grated lemon zest
  • 1 tbsp. fresh lemon juice
  • 2 tsp. vanilla extract

Sauce:
  • 2 tbsp. granulated sugar
  • 1 tbsp. cornstarch
  • 2 cups fresh or thawed frozen blueberries
  • 1 tbsp. water
  • 1 tbsp. lemon juice
Makes 32 Servings (1/32 of cake per serving)
  1. Preheat the oven to 350 F. Spray a 10-inch springform pan with nonstick spray.
  2. To make the crust, stir together cracker crumbs, butter, cinnamon and nutmeg in a medium bowl until moistened. Press crumb mixture firmly  onto bottom of prepared pan; refrigerate. 
  3. To make topping, stir together sour cream and sugar in a bowl; cover and refrigerate. 
  4. To make cake, with electric mixer on medium speed, beat cream cheese in large bowl until very smooth. Gradually add sugar, beating  well after each addition. Beat in egg whites, lemon zest and juice, and vanilla until blended. Pour batter over crust. 
  5. Bake until center of cheesecake jiggles slightly, 55-60 minutes. Let cool in pan on wire rack 15 minutes. Spoon sour cream topping over cake; spread evenly with narrow metal spatula. Refrigerate at least 8 hours or up to 2 days. 
  6. To make sauce, stir together sugar and cornstarch in medium saucepan. Add blueberries and water; cook over medium heat, stirring, until berries soften and sauce bubbles and thickens, about 4 minutes. Remove saucepan from heat and stir in lemon juice. Transfer sauce to serving bowl and refrigerate until cool. 
  7. To serve, with thin knife dipped into hot water, cut cake into 32 wedges, dipping knife between cuts and shaking off excess water. Serve cake wedges topped with blueberry sauce.
WW POINTS VALUE: 4 pts.

Note: This recipe appears in the WW New Complete Cookbook. You can have your cheesecake and eat it too. The original recipe called for light corn syrup but I eliminated the corn syrup and added ground cinnamon and nutmeg to add more flavor to the crust and it was delicious. I also cut the granulated sugar in this cheesecake and added a little more lemon juice and limoncello for a more lemony flavor and the cheesecake was delicious. The blueberries add a nice, tart flavor to the cheesecake as well.